
As a content creator, writer or self-published author you are already creating amazing content. In fact, your content is so good you have decided to take it a step further by making it into an ebook or guide for your community.
The question you are probably trying to figure out is how to do that in a way that will cost you as little as possible (or free, free is always great), with very little hassle or stress involved.
This helpful tutorial is just what you need.
Re-introducing – Flutterwave Payment Links
What’s that?
A payment link is a simple way to collect payments by sharing a personalized link to your customers for them to pay you or accept donations.
It’s a really handy feature of Flutterwave that allows you to receive payments securely, for both you and your customers, without needing a website.
You can also receive your payment via all the payment methods available on Flutterwave i.e. card, bank account, USSD, MPesa, Ghana Mobile Money, etc. So when you share with your customers, they will be able to pay you with their preferred method of payment.
Remember what we said about stress and hassle-free?
Now, in your case you might already have a website, what you need is a way to place your e-guide behind a paywall, that allows your community to pay you and then get redirected to your link to download what you are offering.
That can easily be done with our payment links.
Here’s a guide on how to set up your payment links first, and the last stage will show you how to essentially put your content behind a paywall.
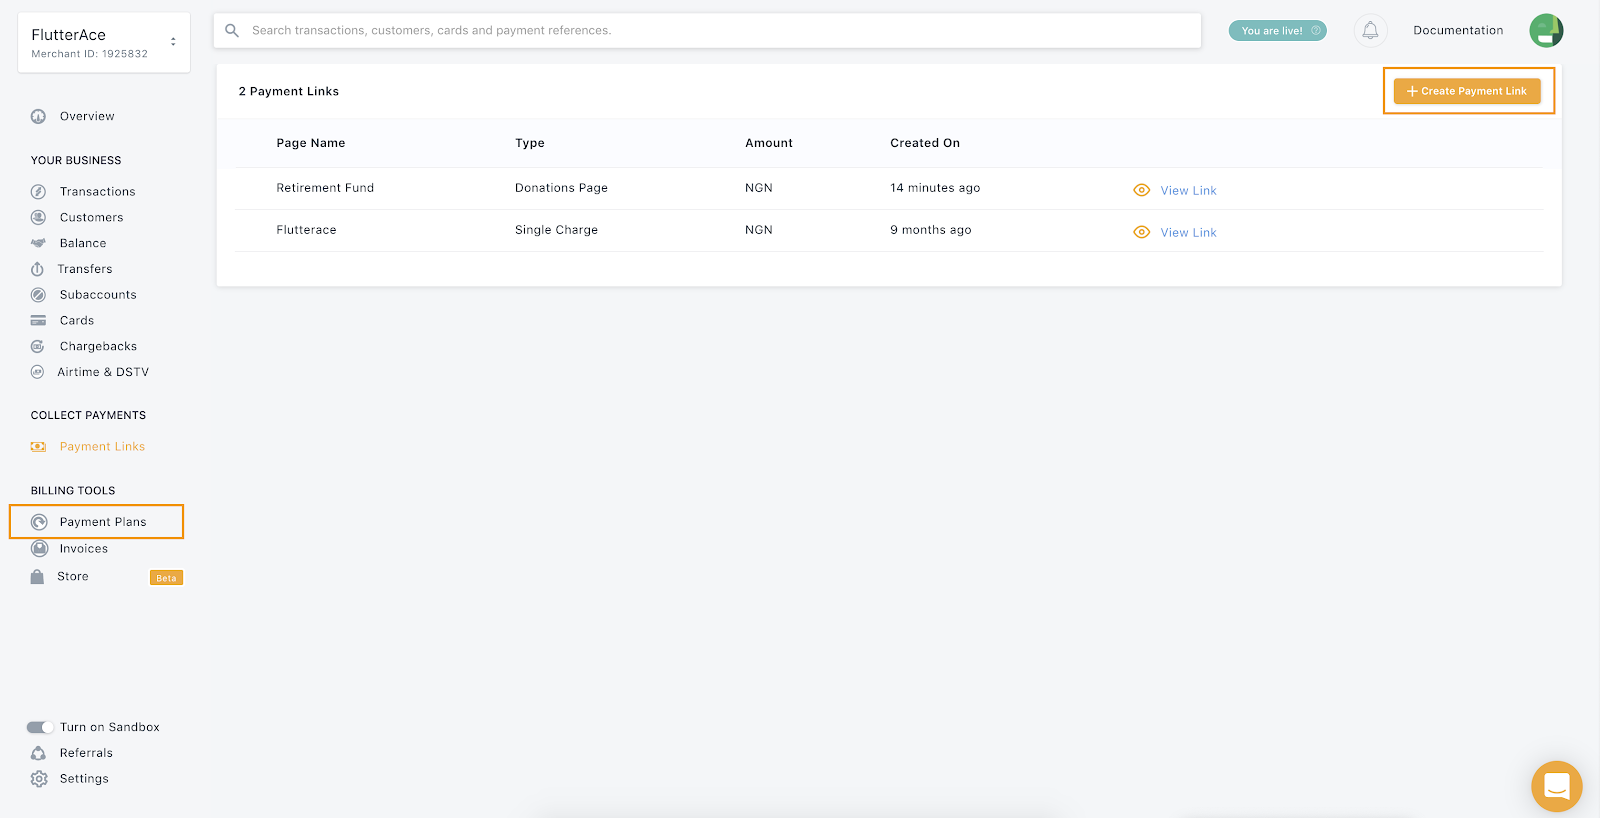
1. In your Flutterwave dashboard, go to the Payment Links page and select Create Payment Link.
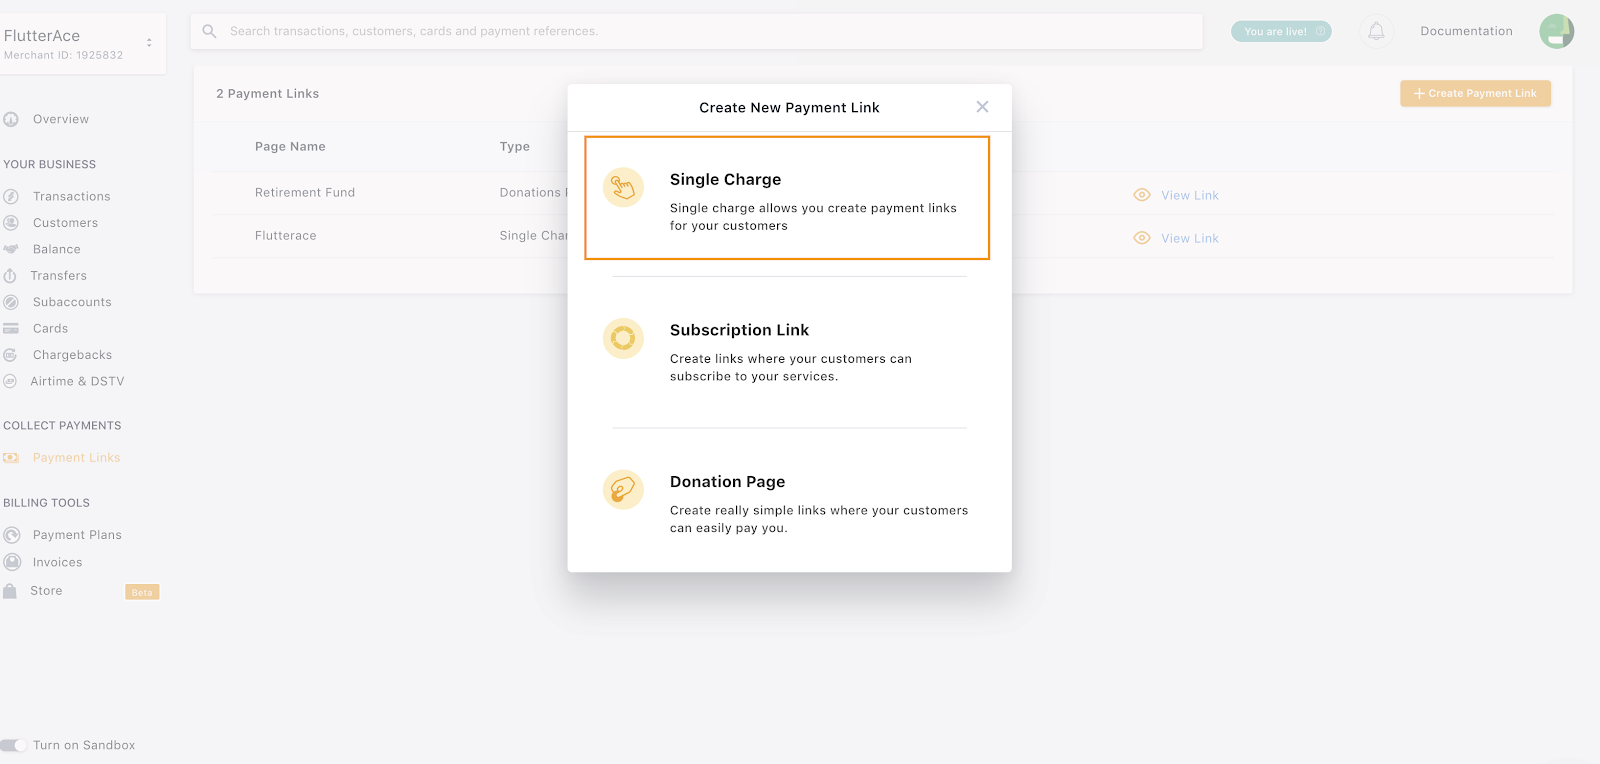
2. For a single payment, select Single Charge. Check out this link if you want to create a recurring charge. In your case, it will most likely be a single charge payment, but you can read more on creating a subscription or recurring payment link here
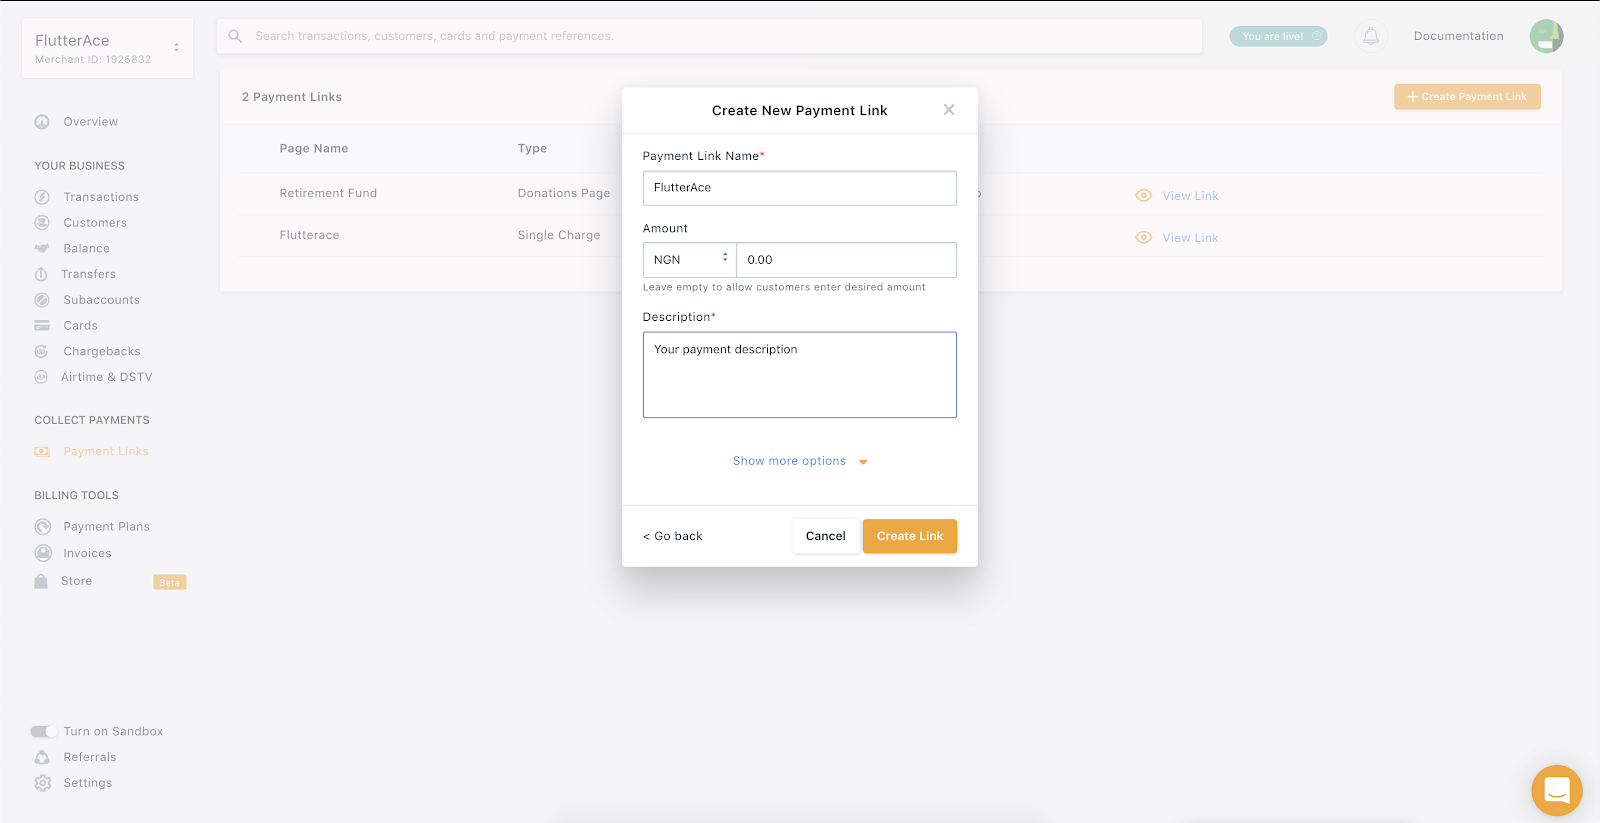
3. Fill in details of the payment; including the cost of your guide or e-book, and a description PS. if you want to allow your customers to specify the amount to be paid, leave the “Amount” field empty.
4. Then click on ‘Show more options’ – this is where you add your additional details, including a redirect link for your ebook or guide download.
You can also specify currencies, collect extra information e.g. your customer name, email address, etc.

5. After this, click ‘Create Link’ and you’ll be able to find the payment link in the ‘Payment Links’ section of your Flutterwave dashboard. Here’s what it looks like:

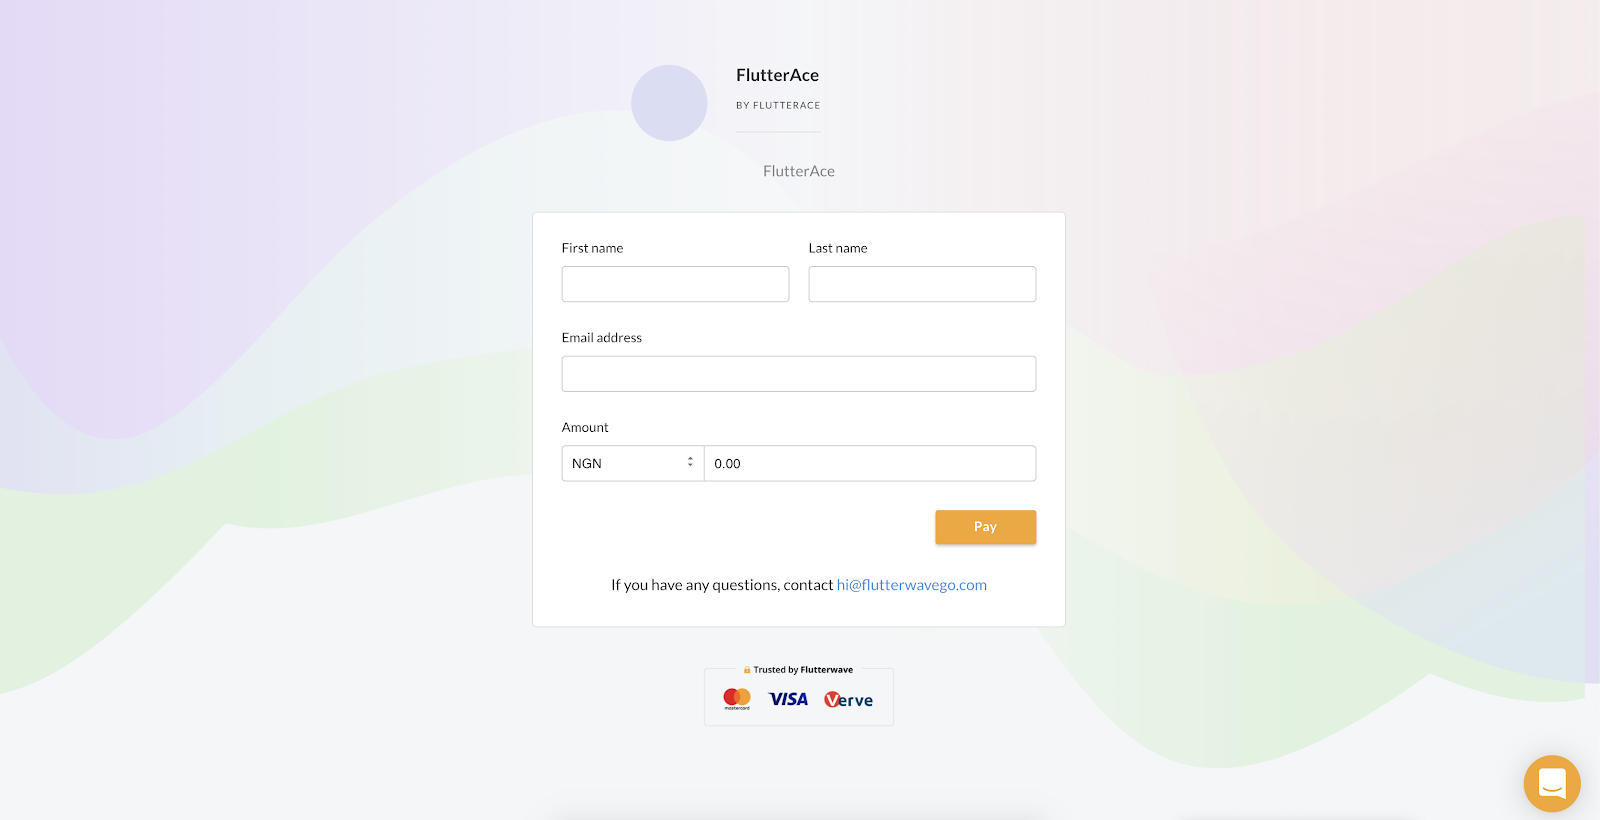
6. Once that’s done, this is what your customers will see when they click on your payment link, if you have included additional details there, it’ll be available there as well.
So now that you have set up your payment link, how do you get people to use it so you can receive payments?
You can embed this link to your website, including it in your Instagram bio, add to your social media marketing and promotion posts and start enjoying payments.
Welcome to self-published life!